
Preparing the Excel Worksheet for Request for Vacation Leave
Spreadsheet Router routes the Excel worksheet through the workflow to different users / roles who can work with the worksheet. When a user is done with a workflow task, the worksheet data is synchronized with Spreadsheet Router and the next users / roles can perform the next workflow steps around the worksheet.
With Spreadsheet Router, you can create workflows that foresee alternative tasks / paths depending on the data in the Excel worksheet. For example, when the request for vacation is declined, you may want other workflow tasks to follow than when the request is approved. Any data field / cell in the worksheet whose data you want to be processed in Spreadsheet Router needs to be imported to Spreadsheet Router. Typically, these are
- data fields, that is needed to control the workflow (z.B. decisions like whether or not the request for vacation leave is approved);
- data fields that contain information to identify a workflow instance and
- data fields containing information that you may want to analyze in Spreadsheet Router (e.g. for analysis of parameters across different workflow instances).
Therefore, the first step is to prepare the Excel worksheet to minimize later effort for importing relevant data fileds in Spreadsheet Router.
An Excel Worksheet for Requesting Vacation Leave
In the Excel worksheet, a staff member fills out how much vacation is requested. A superior then records in the worksheet whether the request is approved or declined.
- The worksheet should contain at least cells for the name of the requester as well as start and end of the vacation.
- In addition, a cell is needed to record whether or not the request is approved.
If you don't want to create the Excel worksheet, you may also download the readymade worksheet from here.


Defining Data Fields in Excel Name Manager
Use the Excel name manager to define names for data fields (cells) whose data shall be processed in Spreadsheet Router. This will allow for importing these data fields to Spreadsheet Router with just one click.
Find information on how to define names for cells using Excel name manager in this video tutorial.
- Define a name for each data field (cell) that will contain data that you want to see or analyze in Spreadsheet Router
- Click on the cell > Choose Formulas in the menu > Name Manager > New
- Create a new field > Enter a Name > Click OK
Prevent Mistakes in Excel Worksheet
In the Excel form, there is a 'Approve request' field that should be filled in with 'Yes' or 'No' by a supervisor after the request has been checked. Since we want to determine the next workflow step later in the workflow depending on whether 'Yes' or 'No' was filled in, it makes sense to ensure that only 'Yes' or 'No' can really be entered in this field. We ensure this by storing predefined values for this field in Excel (see example form). This allows users to choose between the predefined values when filling in the form.
Tip: In Excel, you can specify values for a field by selecting the field and choosing Data > Data validation > List. Allowed values can be entered there, separated by commas.

In this first step, we have created an Excel worksheet for the request for vacation and defined names for data fields / cells that contain data that we want to import to Spreadsheet Router. Let us now model the workflow for the request and approval process.
2. Workflow Modeling
First, we need to identify which steps the workflow will have and which users or better roles will be responsible for these steps.
A Simple Worfklow for Request for Vacation Leave
We want to create a very simple workflow for requesting vacation leave in this tutorial.
- Step 1: "Request vacation": Any staff member can fill out the request form and start the workflow.
- Step 2: "Check request": Only staff members with the role superior shall get the request and approve or decline.
- Alternative paths: If approved, we want a staff member with the role office manager to update the vacation account of the requester. If declined, we want the requester to be notified and confirm.

Create Users and Roles
We want three roles for the vacation request workflow: staff member, superior and office manager, who updates the vacation account. Spreadsheet Router lets you assign multiple roles to a user. A role, in turn, can be shared among multiple users. For simple testing, give yourself all three roles.
- Tab Administration > User Management > Add > add the three roles
For more details, watch this video tutorial. We'll use the roles later when creating workflow tasks to ensure that the tasks are executed by the respective roles.

Create a New Workflow Template
Go to "Administration" > "Spreadsheet Templates" > "New" to create a new workflow template. Then, upload the Excel worksheet in the dialog.
We recommend to install the Spreadsheet Router add-in for Excel. It facilitates interaction between Excel and Spreadsheet Router. When a workflow task is done, the Excel worksheet does not need to uploaded manually. With the add-in, the data in the Excel form will be automatically synchronized with Spreadsheet Router.
Click on the link "Install Spreadsheet Router Add-In for Excel" or download and install from the link below:

Import Excel Data Fields to Spreadsheet Router
In the lower part of the workflow template creation dialog, you can import data fields in Excel to Spreadsheet Router:
- By clicking on "Add all range names" you can import all named fields created using Excel Name Manager to Spreadsheet Router.
- Choose "Add" to add individual data fields. For this you need to add a name. In "Range", please specify the cell of the data field you want to be imported, for example C5 for the name of the requester in our vacation leave example.
Find more information in this video tutorial.


Define Spreadsheet Sections
The next step of the wizard lets you group the imported data fields of the Excel worksheet to sections. These sections can later be used when modeling the workflow in order to define which data from the Excel worksheet is shown to the user when opeing a workflow task in Spreadsheet Router.
- "Header" is a predefined section. Add here all data fields that are relevant for workflow monitoring. You can still add more fields in the monitoring view.
- Add as many sections as you need for the workflow. You can also continue without creating further sections.
For the vacation leave workflow, we want to group the fields to four sections, header, data and approval section. The header shall contain fields with information on the requester like name. The data section contains fields with information on the vacation leave (e.g., start and end of vacation). The approval section shall contain fields that need to be filled out by a superior when approving / declining the request. Grouping the data fields into sections will facilitate the assignment of fields to workflow steps in the later course of workflow modeling.

Modeling the Workflow
Now we're ready to model the steps of the Excel workflow:
- We first create to workflow tasks for the steps "Create Request" and "Check Request".
1. Add a node for "Create Request"
- Task name: "Create Request"
- Description: Add a description for this task, e.g. "Please fill out the worksheet to request for vacation leave".
- Staff assignment: Select "Instance Starter" to make sure that the person starting the request for vacation workflow will receive the task to fill out the request.
- Assigned sections: Header (the starter of the workflow instance will be shown the data of the header section)
- 2. Add "Check Request" als the second node
- Name: "Check Request"
- Bearbeiter: Role "superior"
- Assigned Sections: Header and data section as we want the superior to see all relevant request information when opening the workflow task.
You'll find more information on staff assignment in this video tutorial.

Due Dates and Other Workflow Task Settings
Click on "Show advanced mode" to see more settings for workflow tasks. For a quickstart, you can also skip this part.
- You can use Focus to set the focus on a particular cell when opening the Excel worksheet. This is particularly useful when dealing with huge worksheets to help users to directly get to part that is relevant for them (You can find more information in this video tutorial).
- You can make spreadsheet section uneditable for this task by specifying in Editable Spreadsheet Sections which sections can be edited in this step. More information in available in our video tutorial.
- "Due date" lets you set a due date as well as notifications for the workflow task. You'll find more details in these video tutorials:
In our workflow example, we want the requestor to fill out only the header and the data section while the approval section is reserved for the superior's task (Check Request). In addition, we set the focus for the task Create Request to the Name field and for the task Check Request to the Approval field. For the Check Request task, we further set a due date for 1 day after activation of the task, to ensure that that the task is done in a timely fashion.

Modeling an Alternative Split in the Workflow
For the vacation leave process we want alternative paths. When a superior checks the request, the request is either approved or declined, which leads to different subsequent tasks. This alternative splitting in modeled using the XOR block in Spreadsheet Router. How an alternative split is added is shown in this video tutorial.
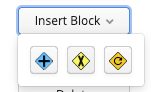
In addition to alternative splits, Spreadsheet Router also lets you capture parallel tasks using an AND block. This video tutorial shows how to use parallel splits. How to model loops in your workflow is shown in this video tutorial.

Adding an Alternative Split to the Vacation Leave Workflow
- We add an alternative block to the workflow (let's name it "After approval").
- For the decision condition for the alternative split, we use the data field "Approval" from the Excel worksheet.
- We map the value "yes" to the first branch of the alternative block (double click on the branch to edit). For clarity, you can rename the branch to "Approved".
- The other branch is mapped to the value "no" of the data field "Approval". Let's also rename this branch to "Not approved" for clarity.
Now that we have modeled an alternative split based on the decision captured in the Excel worksheet, we can proceed with modeling the tasks to be done for each case.
Case request is approved
If a request is approved, we want a staff member with the role office manager to update the vacation account of the requester:
- We add a workflow task to the "approved" branch of the alternative split. This task is for updating the vacation account of the requester.
- For staff assignment we select the role "office manager" that we created earlier.
- It would further make sense to specify that the office manager is shown all spreadsheet data sections we created earlier when opening the workflow task.

Case the request is declined
In case of rejection, we want the requester to be notified and to confirm the rejection:
- On the branch following the rejection of the request we add a task "Confirm rejection".
- For staff assignment we select "Instance starter" to ensure that the requester will be getting the task.
- To show the requester the relevant information when opening the task, we assign all three spreadsheet data sections that we defined earlier to this task.

Manage Access Rights
As the creator of the workflow template, you have all editing and viewing rights. Spreadsheet Router lets you manage various rights related to the workflow template (for example to edit the workflow template, to start a workflow instance from the template or to view the workflow instances / data of the template). Find more details in this video tutorial.
You can edit the rights in this step. You may also continue with the standard settings and edit the rights later when necessary. To complete and save the workflow template, click on "Done".

3. Workflow Execution
Now that we are done modeling a workflow template for the Excel worksheet, we can create workflow instances from the template to request for vacation.
Start Workflow Instances from the Workflow Template
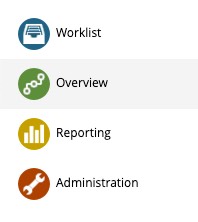
Click on 'Overview' and select the Excel workflow. Click 'Start' to start an instance of the workflow (see this video tutorial for more details). Once you started a workflow instance for the request for vacation process, you'll find the first workflow task (create request) in your worklist.
Starting and Working with Tasks
- Users find tasks assigned to them or their roles in their worklist
- Click on a task in your worklist to start it
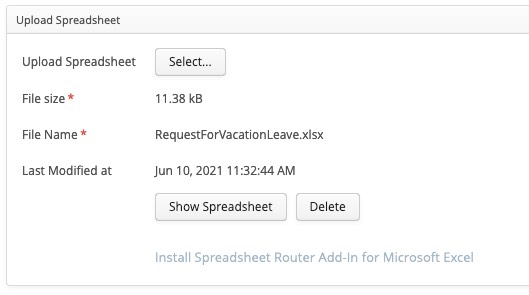
- To work with the Excel worksheet, click on 'Show Spreadsheet' in the task dialog
- You can work with the Excel worksheet as usual
- See also these video tutorials for more details: Spreadsheet Aufgabe starten und Geschützte Ansicht in Excel deaktivieren.
- Use 'Delegate' to delegate a task to another user (see video tutorial).
Completing Tasks
- If you don't have the Spreadsheet Router Add-In for Excel, save your changes in Excel file as usual and upload the the Excel worksheet via 'Select' (see this tutorial for more details: Using Spreadsheet Router without Excel Add-In).
- If you have Spreadsheet Router Add-In for Excel installed, changes of the Excel worksheet will be automatically synchronized with Spreadsheet Router when saving. Manual upload the the Excel worksheet is not necessary.
- Click on 'Finish' to complete the task.
- When a task is completed, the next user(s) assigned the follow-up task(s) will get their tasks in their worklists.

Save a Task to Come Back Later
- Click on 'Save' to save a task so you can come back to it later. You can close the task after saving and resume by reopening it in your tasklist.
Monitor Running Workflows
- Go to 'Overview' and select the workflow you want to monitor. Click on 'Show Running Instances' to view a list of all running workflow instances.
- Select an individual workflow instance and click 'Show Process' to see the workflow model with the current status of the instance.

4. Step by Step Workflow Execution
To play through the Excel workflow we've just modeled, log in for each workflow step using the role used in the staff assignment rule of the workflow step.
Hint: When testing the workflow with multiple user accounts / rules in the same browser, make sure to log out before logging in with another user account.
1. Step: Create Request for Vacation
Log in and start the workflow template for requesting vacation leave. Go to your worklist to find the first task and fill out the request part of the Excel worksheet. If you don't have the Spreadsheet Router Add-In for Excel, upload the Excel worksheet. Then, you can complete the task.
2. Step: Approve or Decline the Request
Log in as the supervisor (unless your user account is already assigned the supervisor role) and open the task to check the request from your tasklist. You can decline or approve the request by filling out the approval part in the Excel worksheet and complete the task.
Alternative 1: Update Vacation Account
If the request for vacation leave was approved in the previous step, the role 'Office Manager' (or whatever role you used in your process) will get the task to update the vacation account of the requester.
Alternative 2: Notification about Rejection
If the request was declined, the starter of the process instance gets the task to confirm the rejection.